
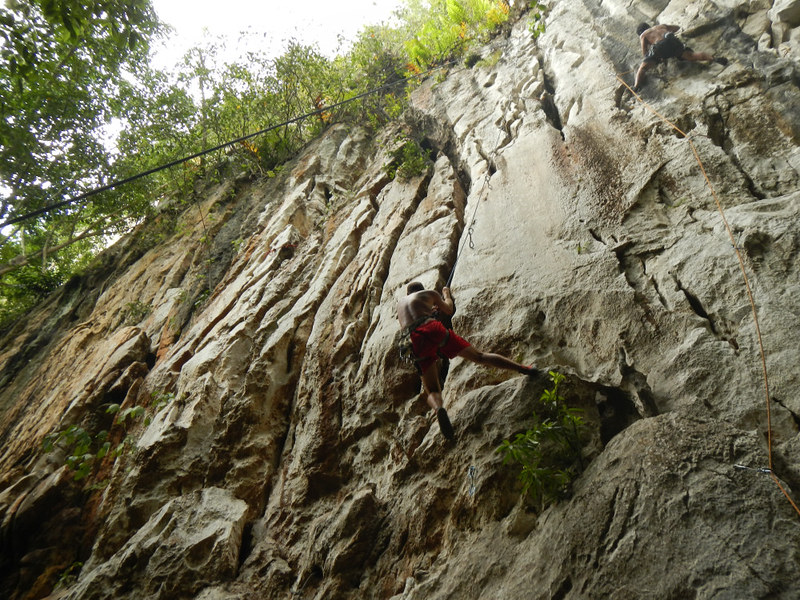
So you now have your rock climbing equipment, and you’re already set up to climb. Now, it’s actually time to climb. Hold on! Before you go up scaling the wall, there’s a major, important process that should be completed, and that’s completely checking for safety. Safety checks in rock climbing are very important and are not meant to be done in short cut. Remember that you are high up on a massive crag, perhaps a hundred feet high. The human body can sustain serious injuries when it falls just around 10 feet high. Now, imagine if you fall 60, 70, 80, or 100 feet high!
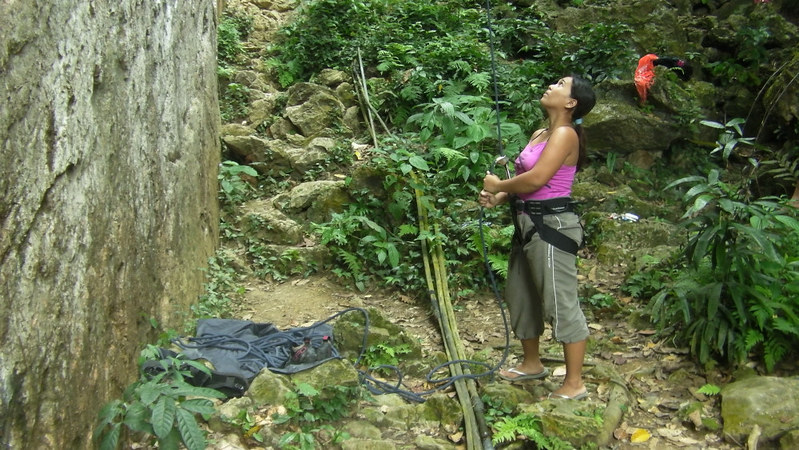
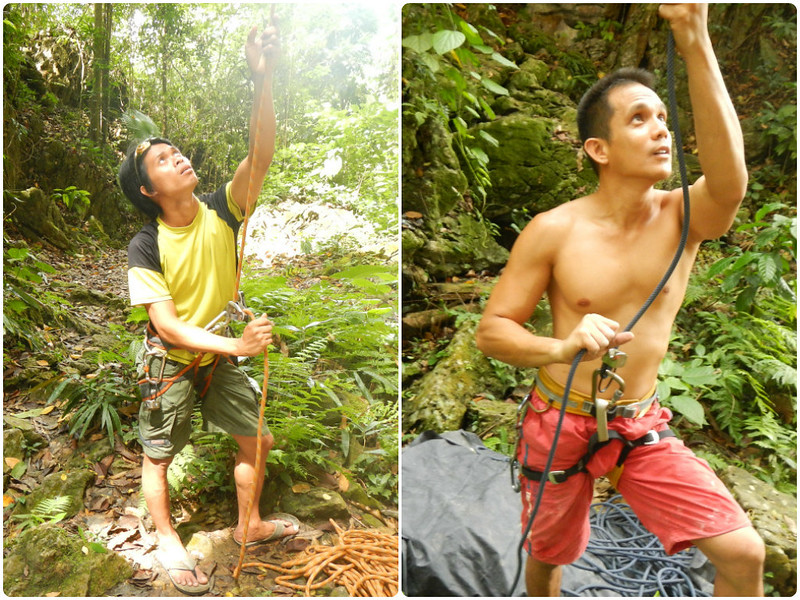
Before you can climb, you need a climbing partner; you can’t climb safely without one. Your climbing partner belays you as you climb. Belaying refers to various techniques that enable a person to apply friction on a climbing rope so that a climber who falls does not fall very far. In addition, your belayer is responsible for increasing/decreasing friction from the rope, or for providing you with more rope so that you can continue climbing.
My forever climbing partner, of course, is my Sweetie Sheila. She belays very well, and I feel totally safe when I lead climb cliffs and artificial walls.
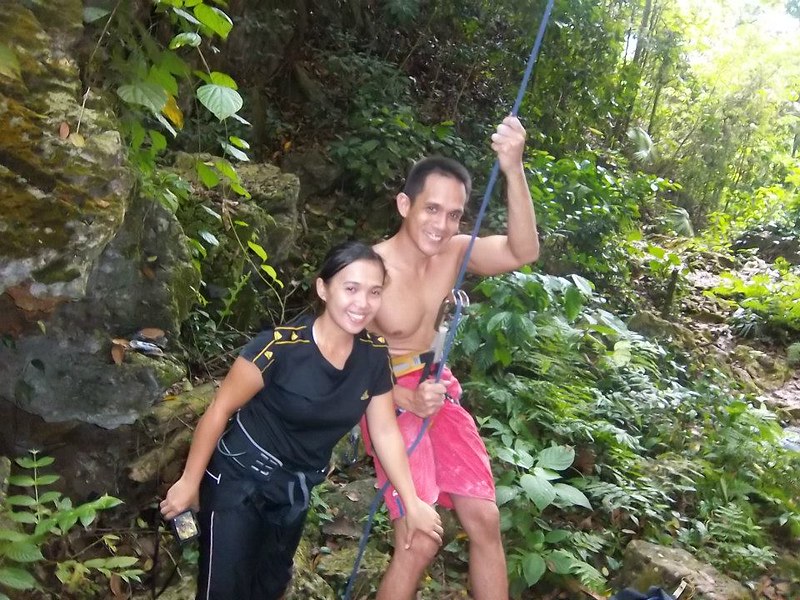
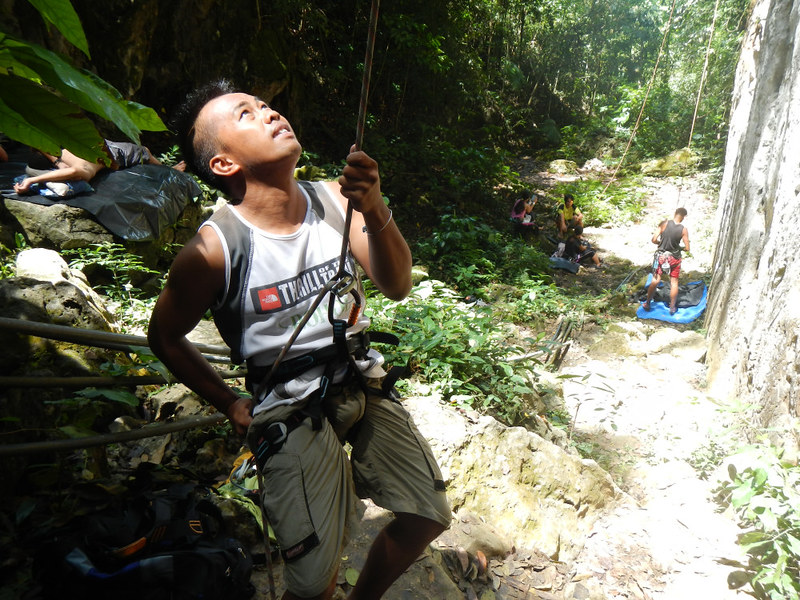
When we went to Cantabaco last Sunday, March 7, Raymund and Martin, a German climber, were already there. For the day, Raymund and Martin are climbing partners.
Safety Checks
First, remove all things attached to your limbs and digits (e.g., watches, rings, bracelets, necklaces, etc.). There’s a big chance that these objects can snag rock features as you climb or fall. Accidents that involve snagging are particularly painful and gruesome.
Check the previous Rock Climbing 101 article to know more about putting on a harness, double-backing, tying the figure-8 knot, and preparing the belay system.
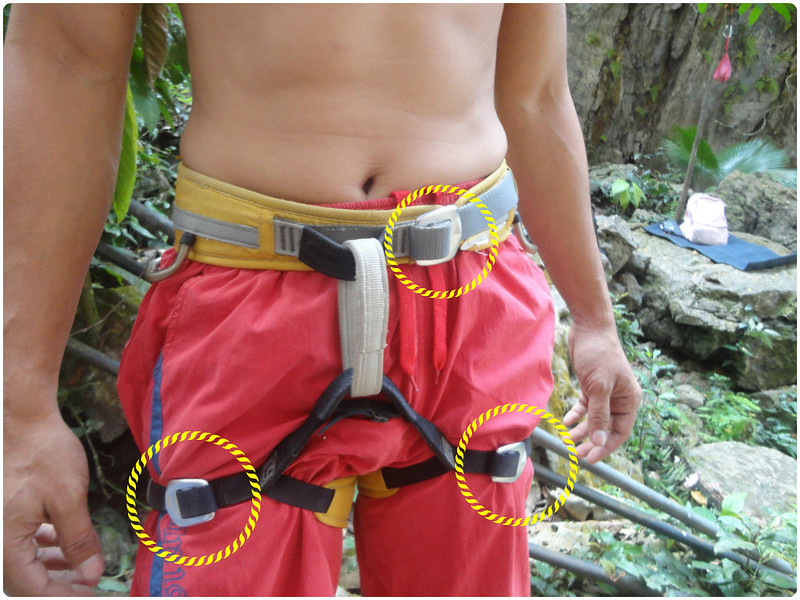
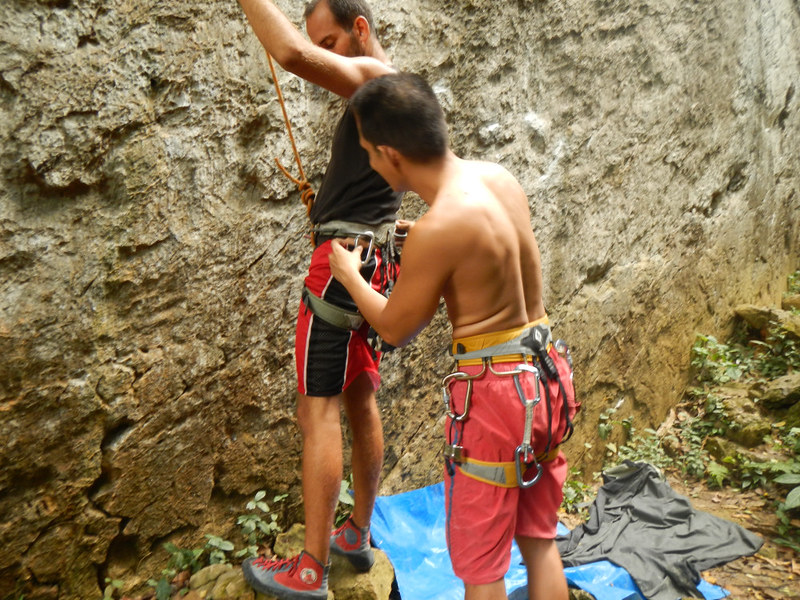
Checking if your harness is properly secured is the first step in the safety check procedure. This also applies to your belayer’s harness. Make sure that all buckles are double backed in 3 places—the waist, the left leg, and the right leg. Also, make sure that the belay loop, cross-piece (the webbing that connects the leg loops to the belay loop then to the waist belt), and the leg loops are not twisted.
Now, you are ready to tie in. Tie yourself in using the figure-8 rewoven knot. You can ask your belayer to help you out if you’re still having trouble with the knot. After tying in, let your belayer double-check your tie-in knot.

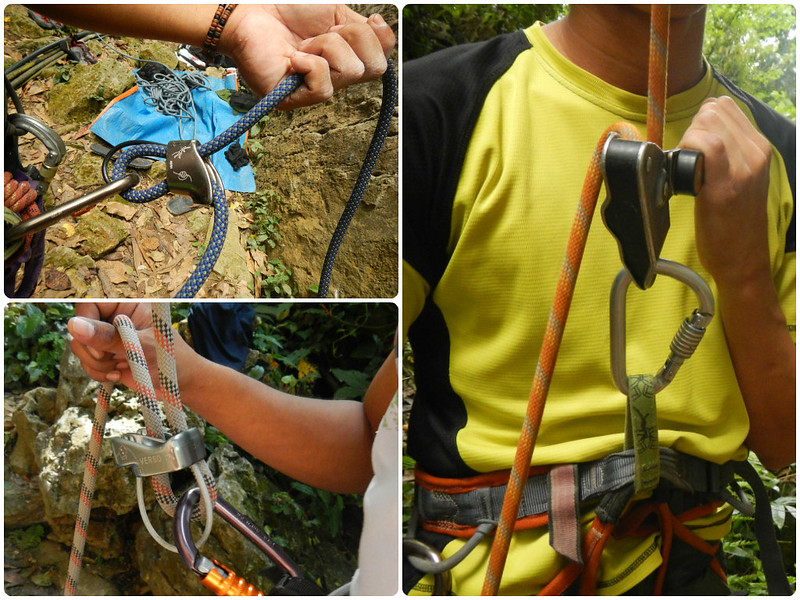
If you are the belayer, make sure you have set up your gear properly. The carabiner should be securely and properly clipped in the belay loop; the belay loop should not be twisted. The rope should be inserted in the belay device and looped through the carabiner. Ensure that the carabiner is clipped through the rope bight, not just the belay device’s wire guide. Check too if the rope is properly oriented. Finally, lock the carabiner gate to ensure the system is inescapable.

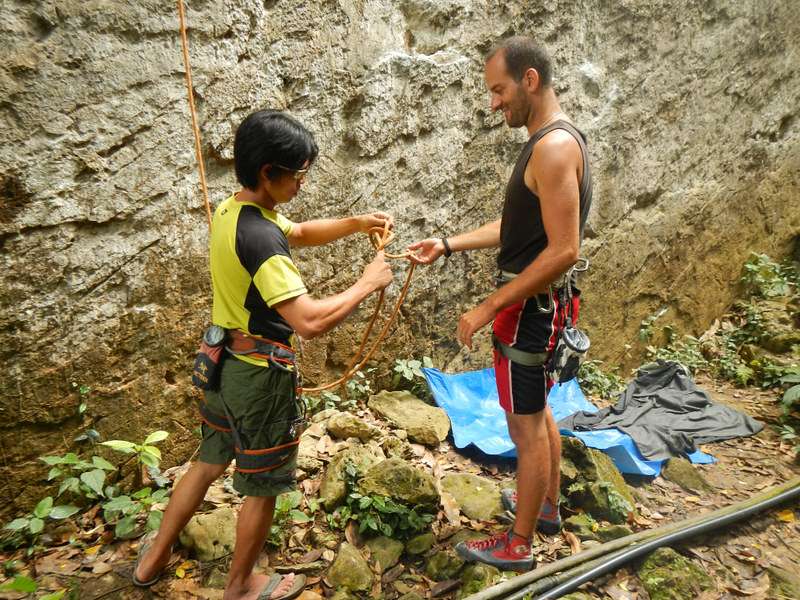
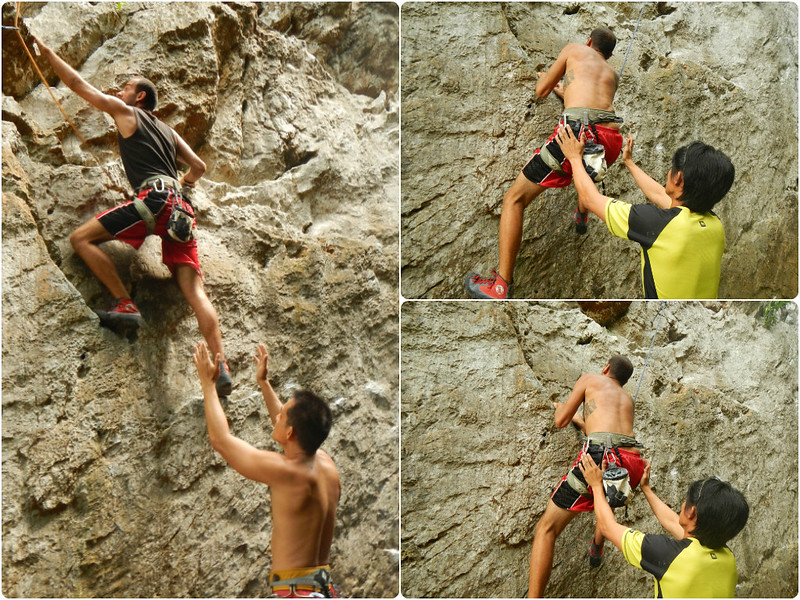
It is actually good practice to check each other to ensure safety. Here, Enie, the belayer, checks Raymund’s, the climber, system. Specifically, Enie is verifying if
- the tie-in knot is done properly,
- the buckles are double-backed, and
- the harness is properly adjusted.
Then Raymund checks Enie’s belay system. He makes sure that
- the carabiner is properly clipped to the belay loop,
- the rope is properly threaded to the belay device,
- the rope is properly looped to the carabiner,
- the rope is properly oriented, and
- the carabiner gate is locked.
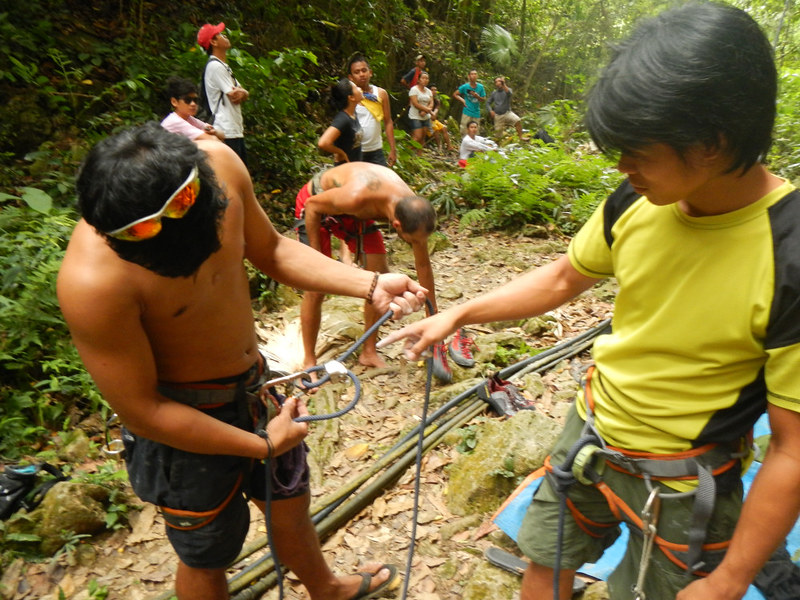
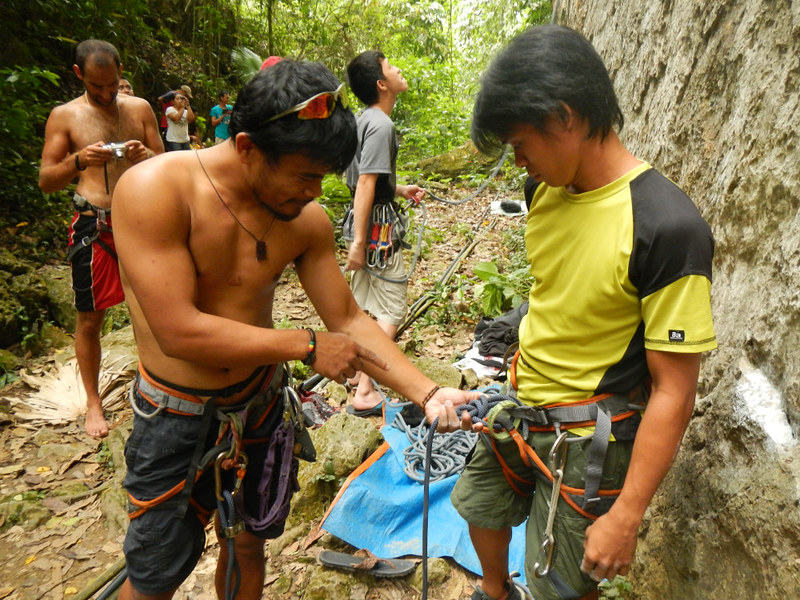
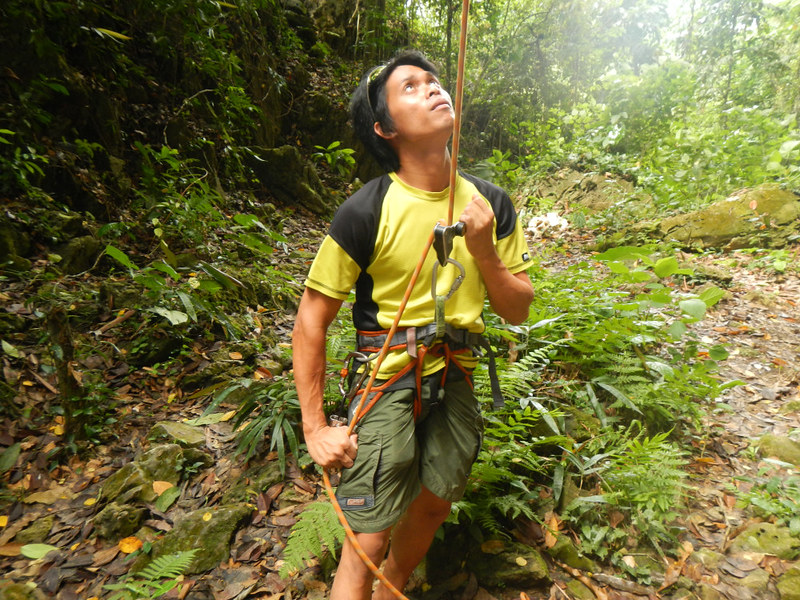
It is even better if there’s a third person to make a last check on both the climber and the belayer. If there are experienced climbers in the area who are free, don’t hesitate to ask them for a third and final check before the actual climb commences. Here, I’m doing a final safety check on Martin.
Basic Commands
The safety and enjoyment of a climb is highly dependent on effective communication between the climber and the belayer. In the sport of rock climbing, we use simple, short commands that are easy to understand and execute. You can use these commands as is, but if the crag is filled with climbers and belayers, make sure you include your belayer’s/climber’s name at the end of the command to avoid confusion (for instance, “Slack, Sweetie” or “Tension, Sweetie”). Also, make sure your voice is loud enough so your belayer/climber can hear you.
If this is your first time rock climbing, you will most probably climb on top-rope wherein the rope is threaded from the climber to an anchor on top of the route then back to the belayer. Basic commands that you will often use in top roping are:
Starting Commands:
- Climber to Belayer: “On belay?” (means: Am I on belay? Am I secured?)
- Belayer to Climber: “On belay!” (means: I’m ready. You are already secured, and I’m ready to take your falls)
- Climber to Belayer: “Climbing!” (means: I’m going to climb now.)
- Belayer to Climber: “Climb on!” (means: You can go ahead and climb.)
Commands on the Rock Face:
- Climber to Belayer: “Slack!” (means: Loosen the rope a little bit. It’s too tight here.)
- Belayer to Climber: “Slacking!” (means: I’m loosening the rope a bit.)
- Climber to Belayer: “Tension!” or “Take!” (means: Pull the rope tight.)
- Belayer to Climber: “Taking!” (means: I’m pulling the rope tight.)
- Climber to Belayer: “Watch me!” (means: Pay attention! I’m going to do a move, and I may fall.)
- Belayer to Climber: “Go ahead!” (means: I’m ready. Make the move.)
- Climber to Belayer: “Falling!” (means: I’m going to fall. The belayer must pay close attention; most falls are so sudden that the climber may not have time to shout this command.)
- Belayer to Climber: “Gotcha!” (means: Don’t worry! I’ve stopped your fall or I’m ready to take your fall.)
- Climber to Belayer: “Ready to lower!” (means: I’ve reached the anchors or I can’t climb up anymore. You need to lower me down.)
- Belayer to Climber: “Lowering!” (means: I’m going to lower you down now)
- Climber to Belayer: “Rock!” (means: Look out below! A piece of rock or equipment is falling, and it might hit you!)
- Climber or Belayer: “Rope!” (means: I’m pulling down a rope! Stay clear!)
Master these commands, and etch them in your mind.
There are several other commands and replies when it comes to lead climbing, but we’ll get into that on a later article.
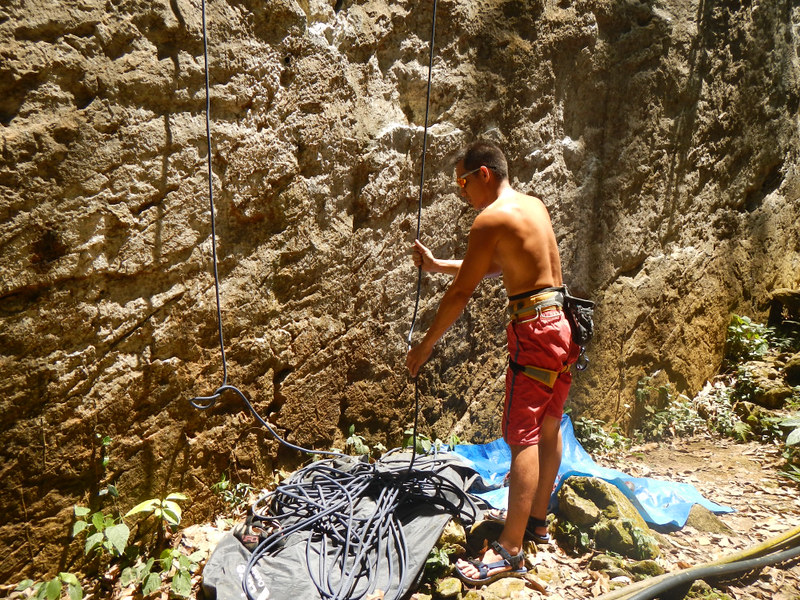
Preparing the Rope for Top Roping
After the lead climber sets up the top rope, he unties his knot and pulls that end down until the other end comes up. This is done to prevent the second climber from swinging wildly if he or she falls.
Spotting
You are now itching to climb! Yes, we know. But remember, safety first! Don’t underestimate the cliff; a lot of injuries happen on the first few feet of the crag.
At the beginning of a climb or in routes which involve a pendulum fall (the climber swings towards the ground if he falls rather than dropping straight down), a climber may need a spotter. A spotter is a person whose task is to direct the climber’s body to the ground during the fall so that the climber lands on his feet.
To spot, position yourself directly behind and below the climber with knees bent slightly and legs apart. Position your arms up with a slight bend at the elbows. Your palms should be facing out, and your fingers must be pointing upward.
As the climber scrambles up, raise your arms with your palms near his hips or torso. If he falls, quickly grip his hips and steer him towards the ground.
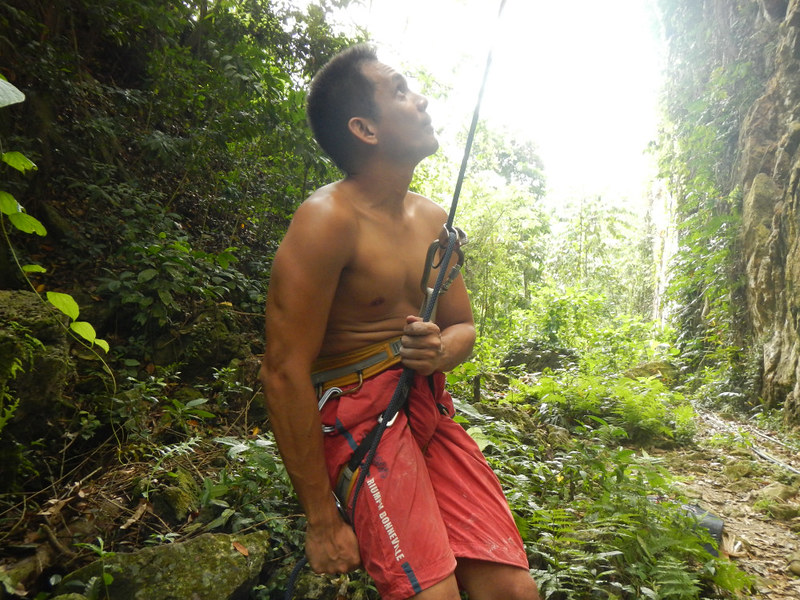
Proper Belaying Technique
It is a great honor to belay someone. That’s because when you are the belayer, the climber actually entrusts his life to you. That is not figuratively speaking; it’s literal! When you belay someone, his or her life is in your hands! That is why Sweetie and I have a very strong bond; we literally entrust each other’s lives in each other’s hands when we climb.
As a belayer, you must realize that you have a great responsibility in keeping your climber safe and alive. Thus, it is extremely important that you know how to belay properly. Remember the popular Spiderman quote, “With great power comes great responsibility.” Because a life is at stake here, you have to understand that belaying is serious business.
First and foremost, always be alert. Focus on nothing else but the climber on the line. Forget the world and the people around you. Don’t get distracted by anything and anyone. In this world, the only people who exist are you and your climber. In rock climbing, complacency can be a killer, and a concentration lapse can end everything.
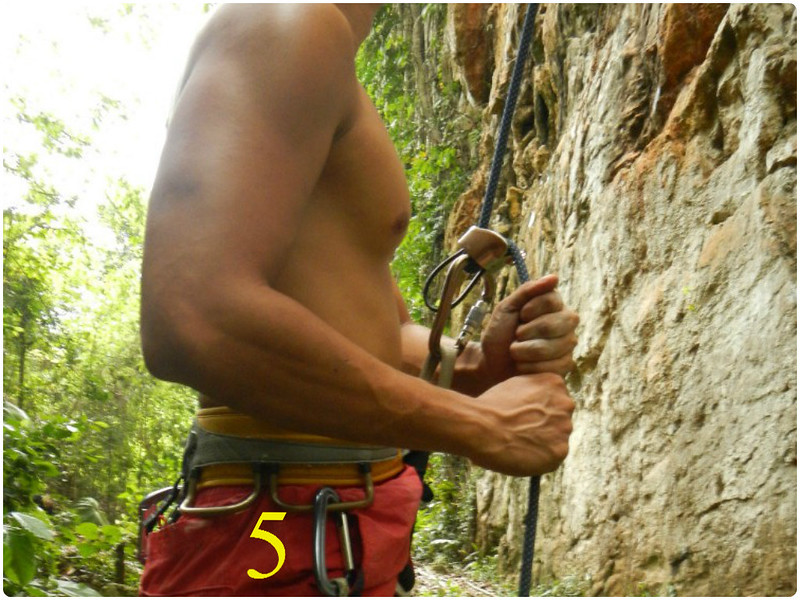
When belaying a climber, make sure the carabiner is not cross-loaded. Cross loading means that the carabiner’s gate or spine is taking the load. This usually happens when the carabiner somehow shifts, and the gate or the spine side of the carabiner ends up crossing the rope or the belay loop where the carabiner’s strength is at its weakest.
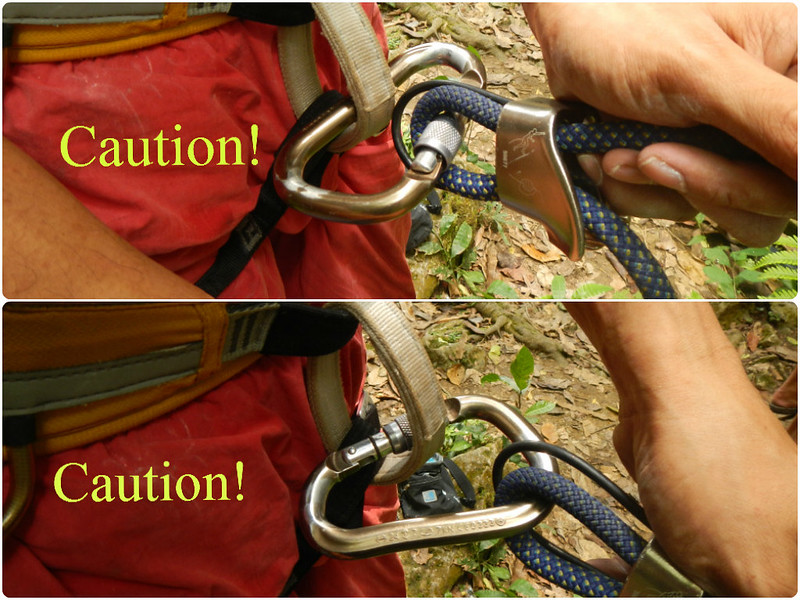
Now, why is cross-loading dangerous? Well, a carbabiner is designed to be loaded only along its long axis, specifically at the bends above and below the spine. It is weaker in any other direction of weight and stress. The gate is the weakest part, and if shock loaded under the weight and stress of a falling climber, it might snap off!
From time to time, always check the carabiner if it’s not cross loaded. The photos below show the proper orientation of non-cross-loaded carabiners. Notice that all attachment points are at major axis of the carabiner.
Get into the proper belay stance by putting one of your feet forward to balance yourself against the weight of the climber.
Let us assume you are right-handed like me. Your right hand is called your brake hand while your left hand is called your guide hand. If you’re left-handed, then your dominant hand should be your brake hand.
Step 1: Grip the climber’s end of the rope with your guide hand. Grip the brake end of the rope (the rest of the rope that leads to your coil) with your brake hand. Your brake hand must never leave the rope.
Step 2: As the climber climbs, the rope creates slack. Pull that slack out with your guide hand. Then pull that slack through with your brake hand.

Step 3: Bring your brake hand to your hip. This is the proper locking position, which locks the rope in case the climber falls.
Step 4: Place your guide hand around and above your brake hand and slightly behind the belay device. Some belayers place their guide hand right under the brake hand rather than over their brake hand. This is also a valid and safe technique.
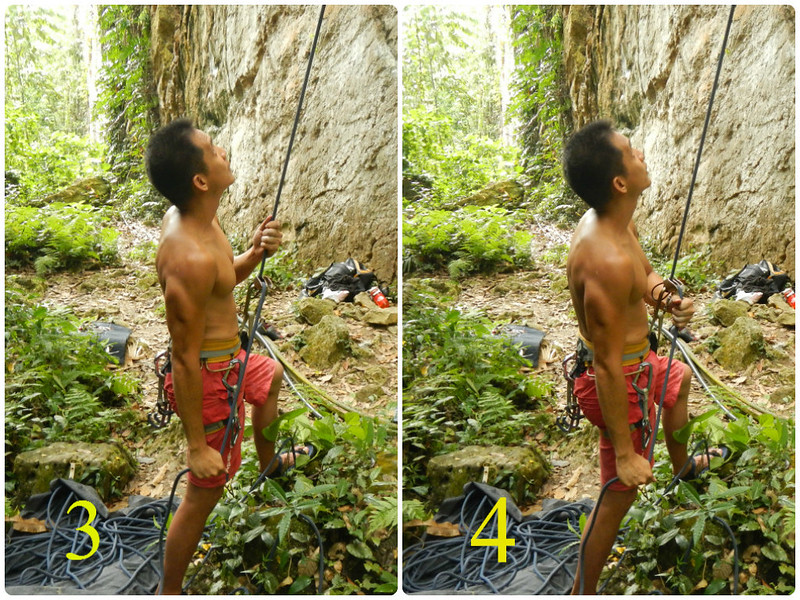
Step 5: Slide your brake hand toward your guide hand. You have just completed a belay cycle. To start another cycle, place your guide hand on the climber’s rope and repeat the entire process.

Let’s check that out again in a closer another angle.
Step 1: Hold the climber’s end of the rope with your guide hand. Grip the standing end of the rope with your brake hand. Remember that in no way should your brake hand leave the rope.
Step 2: The rope slackens as the climber goes up. Pull that slack out with your guide hand. Then pull that slack through the belay device with your brake hand.
Step 3: Lock the rope by bringing your brake hand to your hip.
Step 4: Place your guide hand around and above (or below) your brake hand.
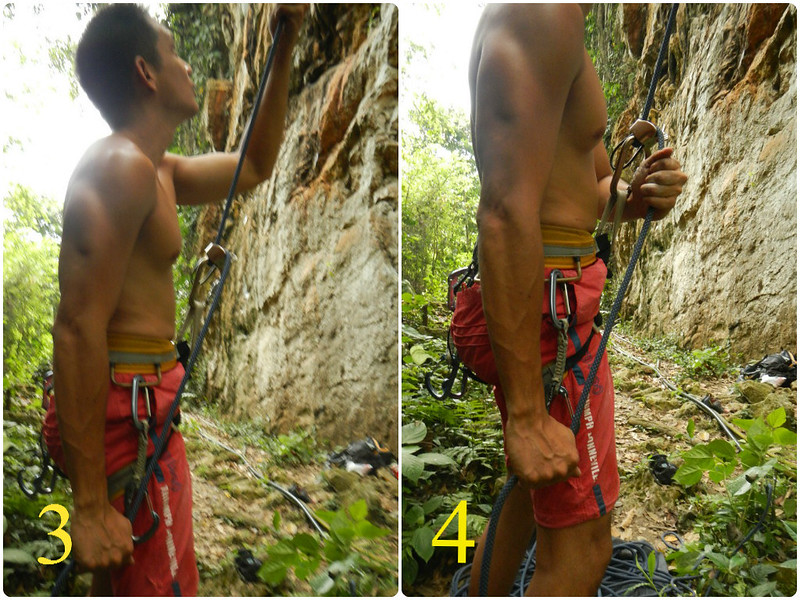
Step 5: Slide your brake hand up toward the guide hand and the belay device. To repeat the cycle, grip the climber’s rope with your guide hand and repeat the process until the climber reaches the top.
Lead climbing entails another set of belaying techniques. We’ll get into that in a later article.
What should you do when the climber falls?
Quickly lock the rope (Step 3) to stop the fall. To lock, position your brake hand on or a little behind your hip.
Always concentrate on the climber. Never leave your eyes off him or her. Yes, you can converse with others around you, but your whole concentration should be on your climber.
Spectators, avoid talking to a belayer while he or she is in action to avoid distracting him or her.
Once the climber reaches the top of the route, it’s time to lower him down. To lower him down, take up all slack and position your brake hand on your hip. Put your guide hand near and behind the belay device.
When he is ready to lower, bend your knees a little so you can counter the climber’s weight. Gently ease up your brake hand on the rope your brake hand to reduce friction. Guide the rope to the belay device with your guide hand. Continue doing so until the climber has safely touched the ground.
The same technique applies when you’re using an auto-locking belay device such as a Petzl Gri-gri. We’ll discuss about using the Gri-gri in a later article.
The coach and the student!
Important Note:
Rock climbing is an inherently dangerous sport. Although blogs (including ours), books, tutorial videos, and articles could be a good source of information, you should find a certified climbing instructor to properly coach you through the sport. Please contact Enie Yonson at 0943-0688985 or 0948-7124875. You can also search his name on Facebook or send a message to him through the BASO..body and soul Facebook page.

Cool! I understand it better now. I had my first rock climbing experience last Sunday and just wrote about it. Our lead climber and belayer were great.
And, you two are such a sweet climbing team! Trust on the belayer is really important and you two definitely have it in spades!
Hi, Claire!
Your insight about rock climbing is a real eye-opener, especially for those who want to try rock climbing for the first time and remarkably for us too who have been into rock climbing for a few months now. Cheers to you!
And looking at your pictures of Atimonan’s cool white cliffs, we might want to visit the place one of these days. 🙂
[…] Rock Climbing 101: Safety Checks, Communication, and Proper Belaying Technique (adrenalineromance.com) […]
[…] Here’s a link to a blog with actually safe rock climbing advice: Adrenaline Romance. […]
Good post of you!! This blog will surely help those who are crazy about rock climbing. Even under the dangerous milieu, this sport is full of adventure and excitement. Practice makes a man perfect, still you need a basic knowledge to begin this up. Its the rock climbing course I attended in Alberta that is helping me all these years. I think such training are necessary for all those who wish to pick this sport as their passion.
Hello Bryan,
Thank you for the compliment. Actually, as far as we know, Cebu doesn’t have formal institutions that offer rock climbing courses.
Excellent and very thorough post. Not only are the pictures informative, but it is nice to see some of the places you guys get to climb down south. Keep the info coming!
Hi Chuck,
Thanks for the compliment. Give us a shout-out if you’re planning to visit Cebu.
Many thanks for such an informative blog.
You make things so very clear with your great photos.
Dave
Hi Dave,
Thank you for dropping by. As they say, pictures tell a thousand words. 🙂
This Post is to much help, is there any other sites that you would suggest visiting for additional information to explain why rock climbing safety depends on skills, reliable equipment and physical conditioning. ? (:
Kellie
Hello Kellie,
Thanks for taking time to visit our blog. As to your question, try the British Mountaineering Council; the site offers a lot of tips. Go to the “Rock Climbing” tab.
Great post! The pictures are awesome to show the basics of the partner check, congratulations!
Hi usprodigo,
Thank you so much for visiting and for the compliment. Partner checks should be mandatory when rock climbing.
Awesome post.
Thank you!
I don’t see any helmets. Certainly this is an oversight as a helmet is a must for climbing safety.
Yes, your observation is right. Unfortunately, we don’t have helmets because at the time of writing this blog post, we don’t have a budget for the helmets. They’re pretty expensive in our place.
But you’re absolutely right. A helmet is needed for climbing safety, especially if you’re climbing a newly bolted route.
[…] Rock Climbing 101: Safety Checks, Communication, and … – Rock Climbing 101: Safety Checks, Communication, and Proper Belaying Technique […]
Great post!
Thank you. 🙂
[…] you run out and start scaling the nearest cliff, understand that safety is important. Find a local club or organization and have someone teach you how to climb safely and properly. […]
[…] Rock Climbing 101: Safety Checks, Communication and Belaying– It is important for both the climber and the belayer to stay as safe as possible when they are climbing and this guide will show you how. […]
Adventure sports is great for the thrill of it and also for your mental and physical well being. All of it of course is contingent to you being safe and looked after at all times.
It is important to not just use the right sports gear and equipment but also ensure that they are reliable and high quality.
Get all your safety requirements met with regards to adventure sports on https://xistadventure.wixsite.com/x-ist/shop
[…] you are rock climbing, we cannot emphasize enough the importance of having clear communication for safety purposes. When there are clear communication lines especially if you are a team of […]
[…] at first, it will also prove extremely exciting. What’s more? You’ll be set up with all of the safety equipment and supervision that you could possibly need, so you needn’t worry about falling from a height or […]
[…] To find out more about safety whilst climbing click here. […]
yeet