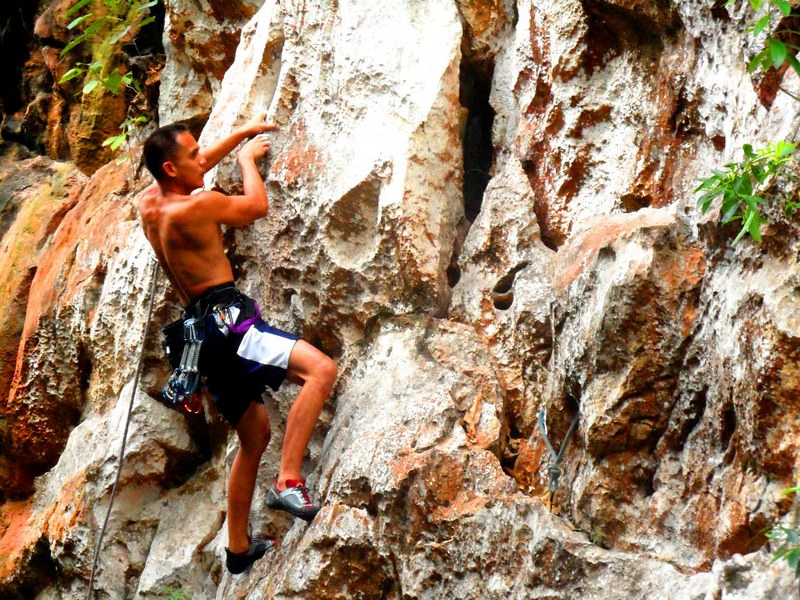
Okay, you now have your new, shiny gear. In fact, you are actually ready to pump it up the crag or the wall. Cool! Now, hold on just a little bit. Do you know how to properly use your brand-new gear? That’s right, let’s prepare your rock climbing gear correctly before you actually scramble up the route.
The proper preparation and use of your gear is extremely crucial to your safety and the safety of your belayer. Your belayer, by the way, is your dependable climbing partner who 1) exerts friction on your climbing rope so that you don’t fall to the ground, 2) feeds you rope when you lead climb so that you can continue climbing, and 3) provides beta (information) if you wish. We’ll discuss more about climbing teams in the next article.
First, lay down all your equipment—harness, shoes, chalk bag, quickdraws (if you’re lead climbing)—below the route you wish to climb. It is advisable to put your equipment, especially your rope, on a tarp, mat, or canvass. The tarp helps prevent dirt and grit from embedding themselves into the rope’s sheath and fibers, which can weaken the rope. Also, avoid stepping on the rope as this works the dirt deeper into the rope.
Uncoil the rope by holding the bulk of it in one hand. Pull one end of the rope, and tie it on one corner of the mat so it will be easy for you to locate the rope’s end. Uncoil the rope by pulling the rest of it and stacking it in a layered coil to avoid tangles.

Setting Up the Climber’s Gear
Okay, your rope is now nicely and neatly uncoiled. It’s time to put on your harness. Mine is a Black Diamond Momentum Sit Harness, which is pretty much generic, and the instructions here may apply to similar harness types or models. Just to be certain, check your harness owner’s manual for proper wearing.
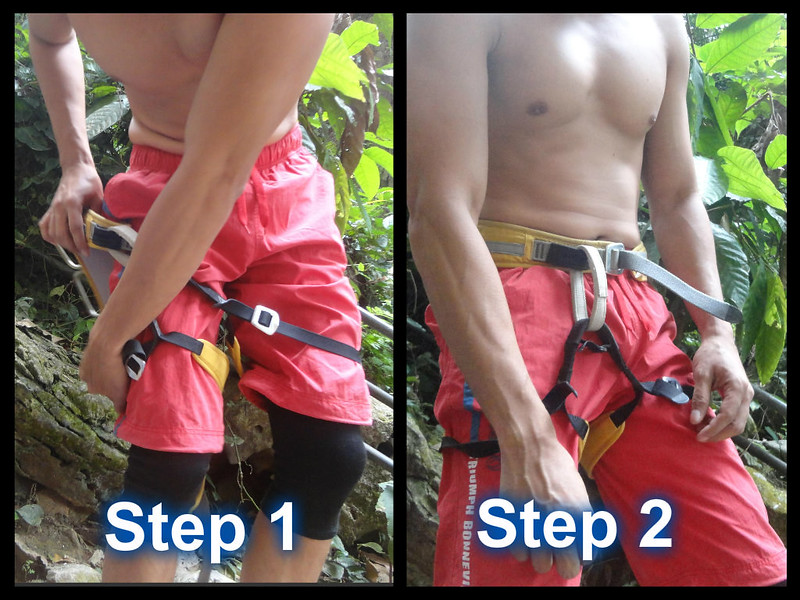
Step 1: Put on your harness by slipping the leg loops through your thighs. You may want to loosen up the leg loops so the task will be easier. Ensure that the leg loops are not crossing each other.
Step 2: Wrap the waist belt around your waist, just above your hips and near your belly button. This position is the safest way to wear your harness; your hips act as a stopper, preventing the harness from accidentally slipping off.
Ensure that the belay loop, that thick piece of webbing in front of your harness, is not twisted and is facing front.
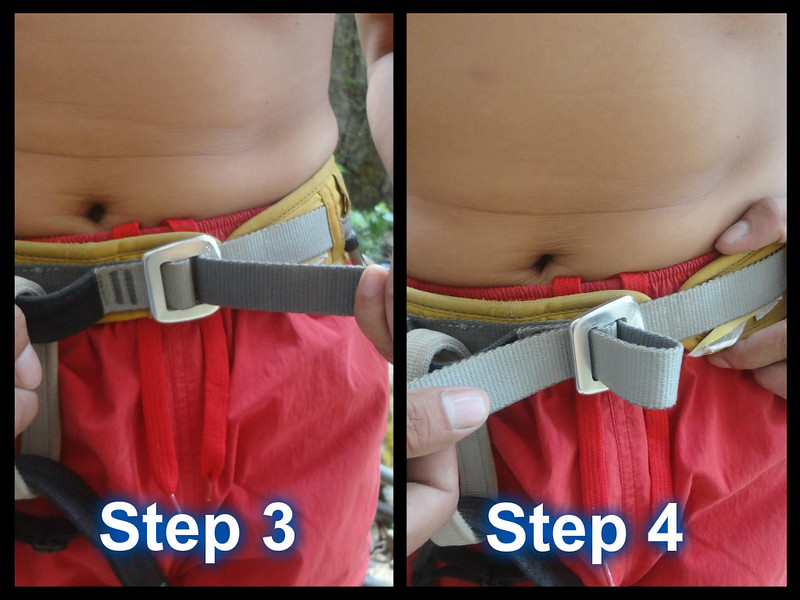
Step 3: Insert the strap into the buckle and tighten.
Step 4: Once it’s snug and comfy, insert the strap on the other side of the buckle to maintain tightness. Make sure that there should be less than a 2-finger gap in slack between the harness and your belly.
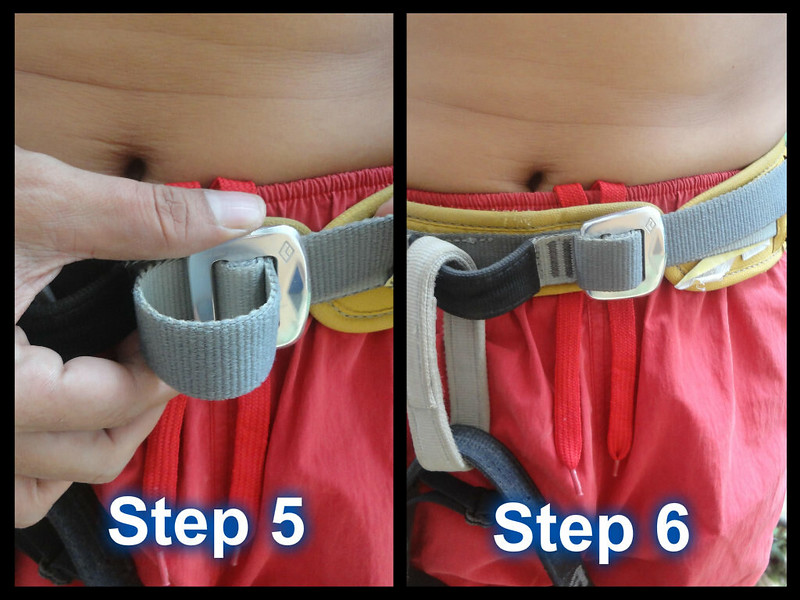
Step 5: To secure the strap and to prevent it from slipping out of the buckle, you need to double back it. Double backing means taking the strap out of the buckle then re-winding it through the buckle. This method is not necessary if your harness has an auto double-back assembly.
Step 6: This is a properly double-backed harness. The waistbelt’s strap should overlap one side of the buckle. Secure the extra length of the strap into the sleeve provided for it.
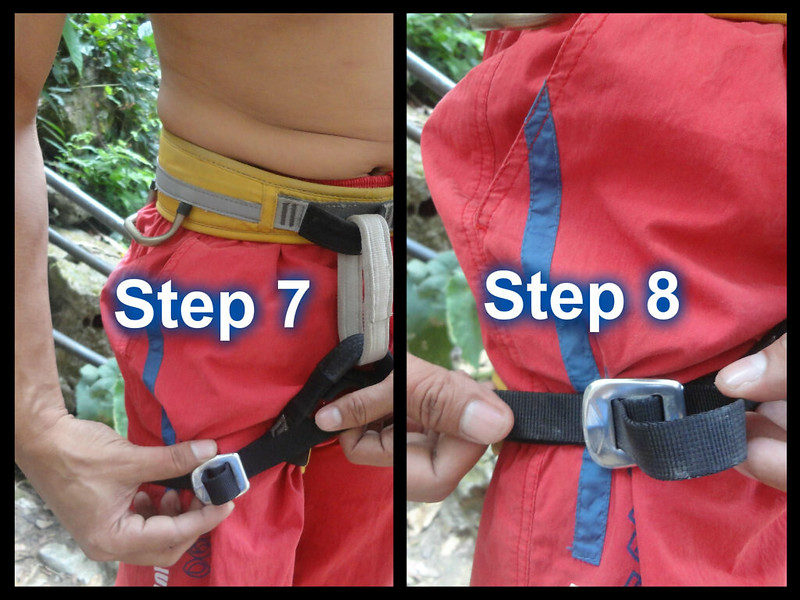
Step 7: Do the same process with the leg loops. Make sure it is snug but not too tight that it reduces mobility.
Step 8: Make sure you double-back the strap once you’ve adjusted the loops to a comfortable position.
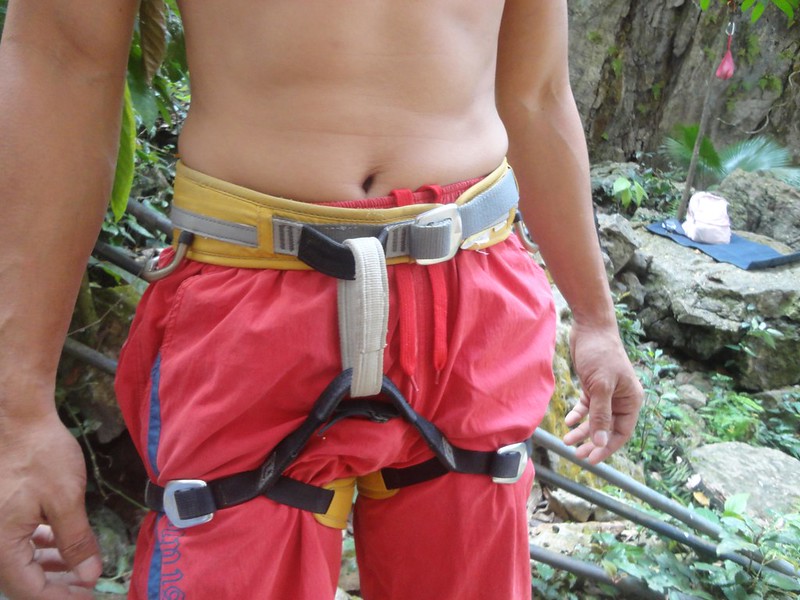
A properly worn harness is snug and comfortable. Straps are doubled back into the buckles and are secured in their sleeves. There shouldn’t be any strap protruding from the harness. The belay loop, leg loops, and the cross-piece (the section that connects the leg loops to the belay loop then to the waist belt) are not twisted.
Tying In
Next, it’s time to tie in. We are going to use a figure-8 follow-through, or rewoven-figure 8 knot, the standard knot for tying in. This is a quick and convenient stopper knot, which means, it doesn’t come undone even if it is subjected to a load. In fact, it jams even more tightly on itself if you fall.
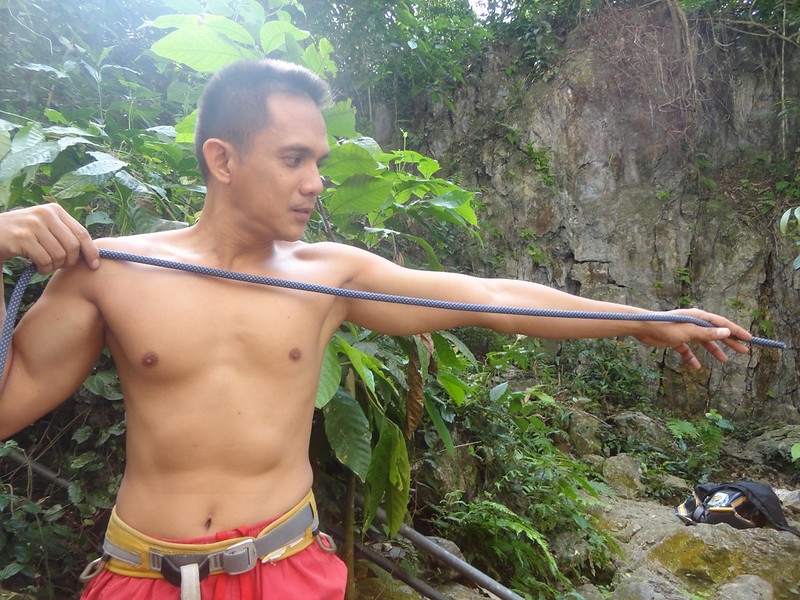
First, take one end of the rope and measure approximately one meter of it. An easy way to measure it is to take the end of the rope and hold it at arm’s length; 1 meter of rope is approximately from the tip of the rope to your shoulder. This one-meter length of rope is called your working end; the rest is called the standing end. Usually, I add a few extra inches of rope to my working end.
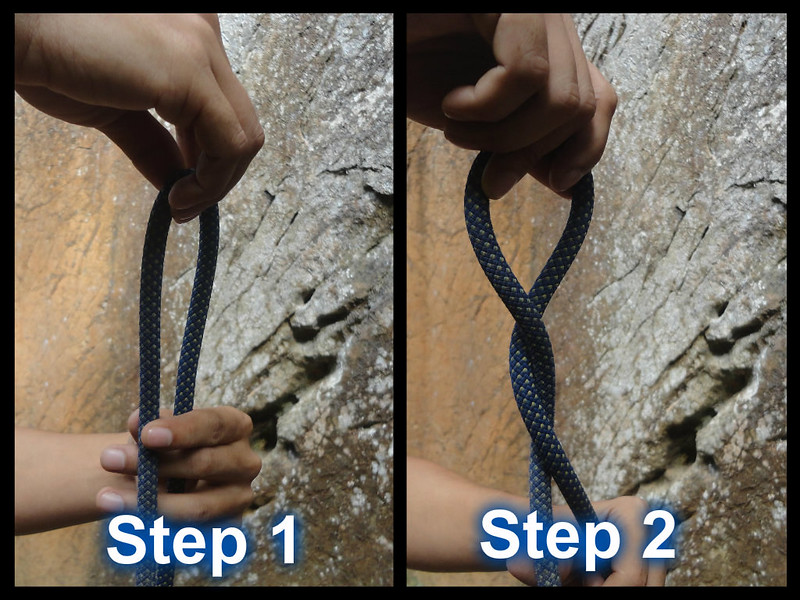
Step 1: Take the far end of your working end and form a bight (a bend or curve). Hold the working end and the standing end a few inches below the bight.
Step 2: Twist the bight twice.
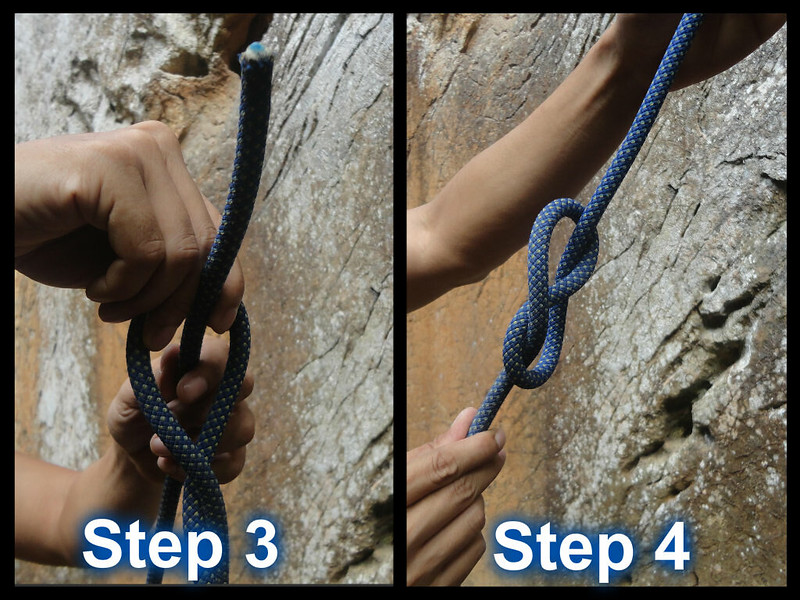
Step 3: Take the working end and insert it into the loop that was created by the twisting of the bight.
Step 4: You now have a loose figure 8 knot, so called because it forms the Roman numeral 8.
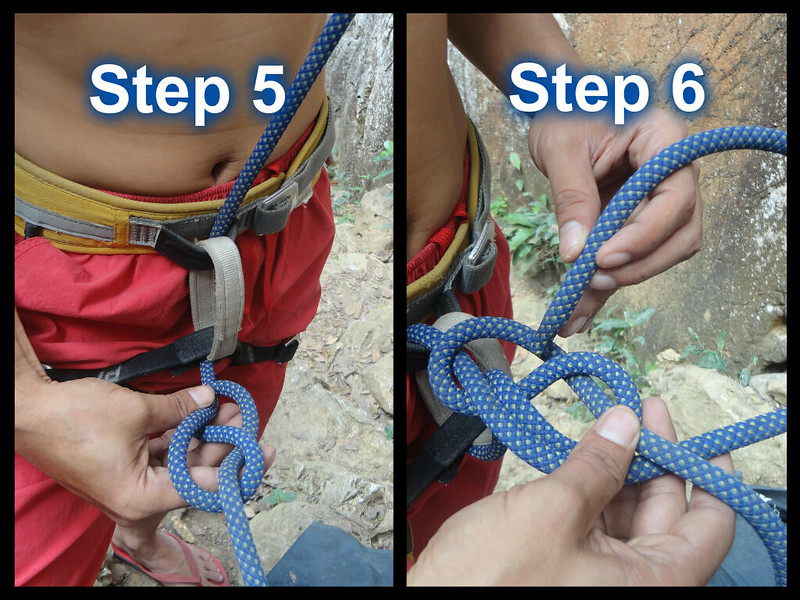
Step 5: Insert the working end into the tie-in loops of your harness. Check your harness’s manual on where your tie-in loops are. Mine is at the center of the crosspiece and waist belt. Sweetie’s Black Diamond Alpine Bod only has one tie-in point at the crosspiece, with the rope passing through the crosspiece and directly behind the waistbelt. The figure-8 knot should be an inch or so away from the tie-in loops.
Step 6: Follow the original figure-8 knot in reverse. If you’re unsure of what you’re doing or if you’re confused as to what goes where, simply trace the standing end with the working end.
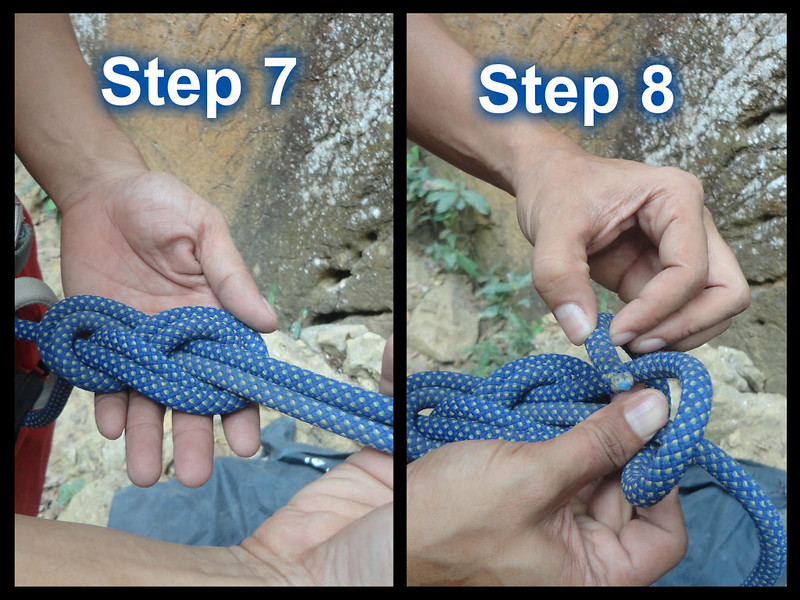
Step 7: That’s a neat and nice figure-8 follow-through knot. Tighten.
Step 8: For safety, lock off the knot by looping the tail end around the extra working end, then around the tail end and inserting it around the loop. Tighten.
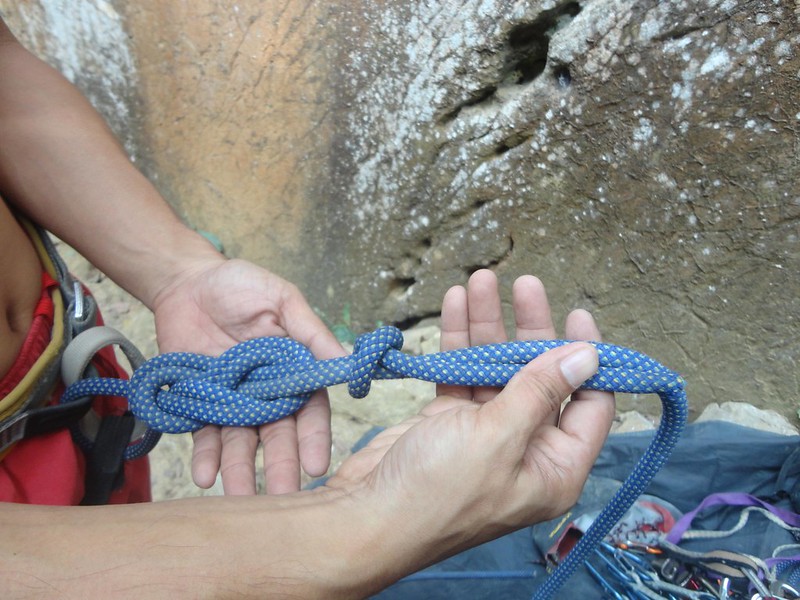
The complete tie-in knot (figure-8 follow-through and locking knot)
Setting Up the Rest of the Climber’s Gear
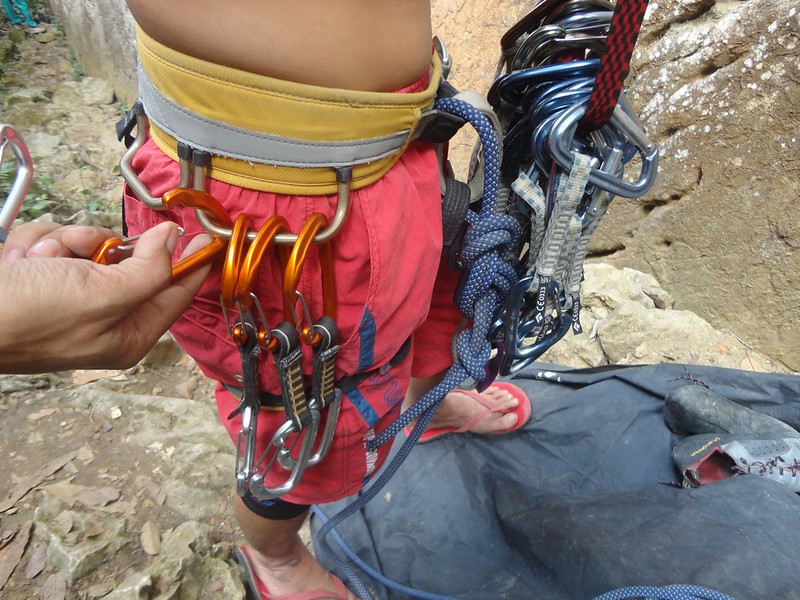
If you’re lead climbing, clip your quickdraws on the gear loops. Warning! Gear loops are NOT load bearing! They’re only used to secure gear. Thus, NEVER tie in to any of the loops, and don’t clip them as a piece of protection at an anchor point.
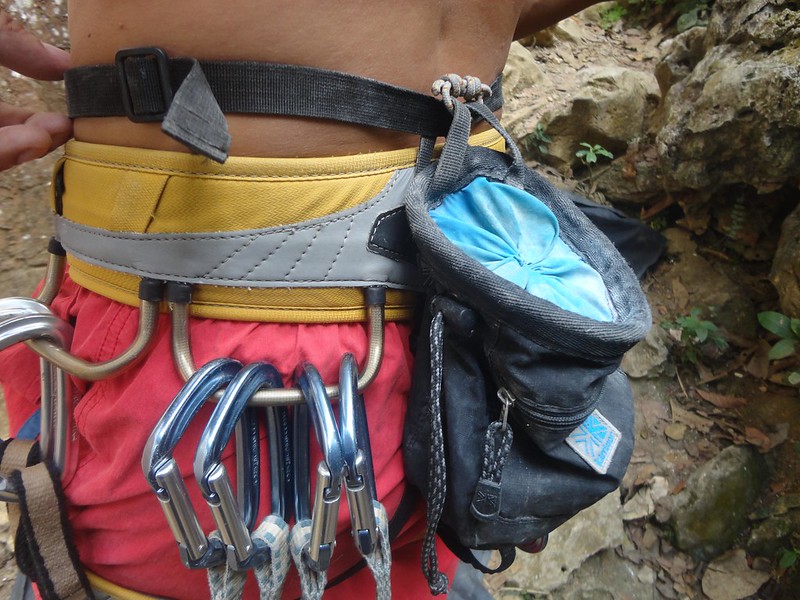
Clip on your chalk bag around your waist. Make sure it’s not too tight or too loose.
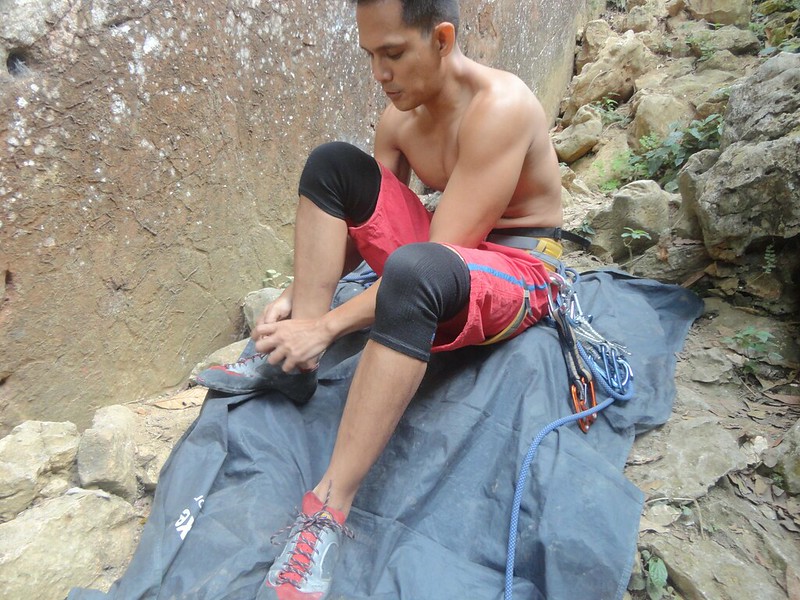
Then, lastly, wear your shoes. Make sure the straps and laces are out of the way.
Setting Up the Belayer’s Gear
Now, it’s time to prepare the belayer, in this case, my Sweetie. First, she dons her harness properly as described above and takes a locking carabiner and a belay device. In this case, she’s using a Black Diamond ATC XP, a tubular belay device. One of the ATC XP’s sides has ridges to create more friction, which is ideal when belaying a climber.
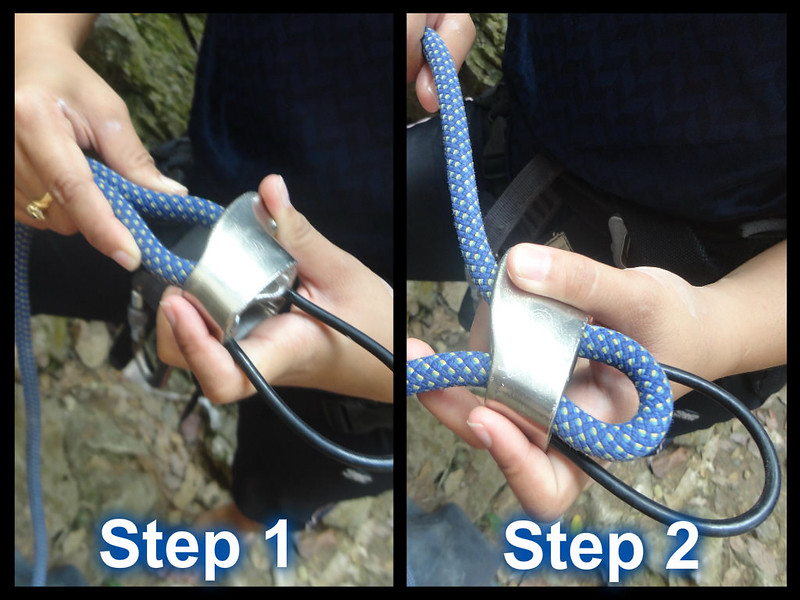
Step 1: Sweetie takes a piece of the rope’s standing end and makes a bight. The bight is threaded into one of the two holes of the belay device.
Step 2: That’s the bight inside the device. Make sure the bight follows the black wire guide under the device.
Usually, the belay device has a diagram etched on its side to ensure the proper orientation of the rope and the device in relation to the climber and the rest of the rope.
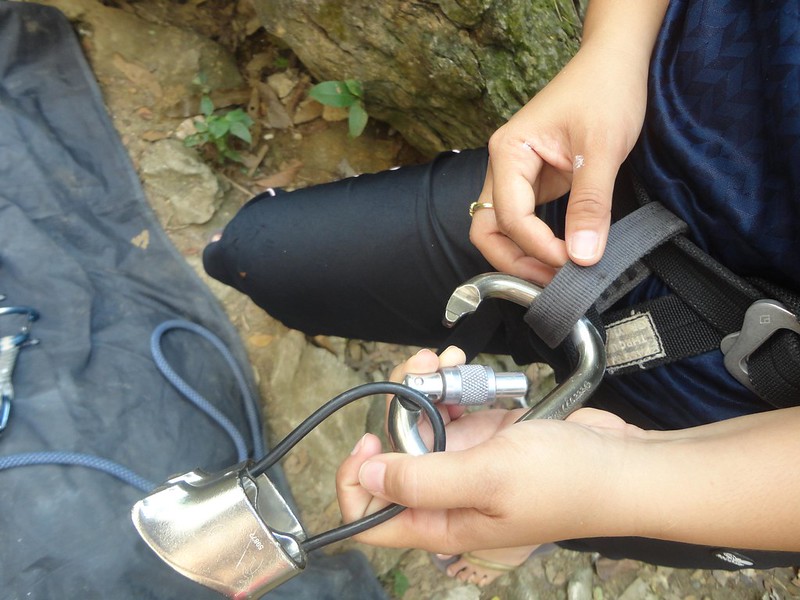
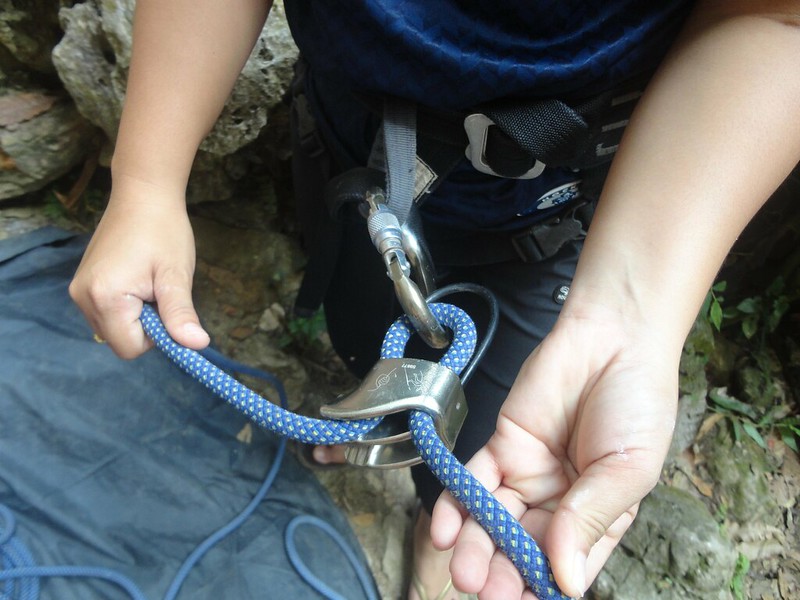
Step 3: Sweetie takes a locking carabiner and clips it to her belay loop. Then she open’s the carbiner’s gate and clips the biner through loop. Make sure that the carabiner is clipped through the rope loop, not just the wire guide.
Step 4: Sweetie twists the carabiner’s lock to secure and lock the system.

She’s now ready to belay the climber. Check the orientation. The rest of the rope feeds to the flared end of the belay device. The climber’s end of the rope is at the non-flared end, as indicated in the diagram.
Next, we’ll discuss about climbing safety and communication.
IMPORTANT NOTE:
Rock climbing is an inherently dangerous sport! We can’t emphasize this enough. Although blogs (including ours), books, tutorial videos, and articles could be a good source of information, you should find a certified climbing instructor to properly coach you through the sport. Please contact Enie Yonson 0943-0688985 or 0948-7124875. You can also search his name on Facebook or send a message to him through the BASO..body and soul Facebook page. He is a local guide and certified coach. We learned our climbing skills under his tutelage . . . and we’re still learning. And please do keep in mind that we are NOT climbing instructors.

These are very helpful tips! 🙂 Thanks for sharing 🙂
Hi Finance Jobs,
Thank you too for reading, and you’re welcome.
If you want to try out rock climbing, do contact us so we can help arrange a session for you and your group with the guides. Of course, you can contact the Cantabaco guides yourself. Their numbers are listed in the blog post.
Happy adventuring!
I miss commenting in your site, Sir Gian and Ate Sheila! I loved this post! Until now, I still could not make an 8-knot confidently. I always forget how to do it myself. Anyway, I miss climbing the crag as well but I think I’m still hesitant to visit Cantabaco again…
Hi Angel,
Hehe! Don’t worry, you will master the figure 8-knot in a few tries.
Sure, please do text us when you want to climb. Please feel free to go to the crag. Everyone is definitely welcome in Cantabaco. Remember that the only person who has problems and issues at the crag is just this certain person who thinks too highly of himself.
Everyone else in Cantabaco is very friendly and accommodating.
Angel,
Let’s go back there soon. We can arrange with sir Enie to go caving at the crag and go rock climbing afterward! 🙂
hi gian thanks your sites very informative i already went camp seven mingllanilla caving with willard and cantabaco rock climbing with raymund in fact i give this guys brand new climbing dynamic rope.
Hello Remy,
Thank you for the compliment. Did you enjoy your experience with Willard and Raymund?
That’s very kind of you to give them a new rope. That will surely help them in their guideship services.
Rock on and hope you’ll have more adventures to come!
Gian and Sheila
[…] Rock Climbing 101: Setting Up to Climb (adrenalineromance.com) […]
Very detailed guide! I wish I’ve read this before doing one…still a good read! 🙂
Hi Angie,
Thanks for following our blog and commenting to this post.
Oh, don’t worry about that. We actually learned how to rock climb BEFORE we read anything about the sport. Hehehe!
My pleasure! It’s an informative blog. Haha, that’s great! I’ll have to do more of the actual climbing then.
Thanks for the guide, very helpful
Thank you, Ryan! Hope you could climb here soon.
[…] starting with tying different types of knots up to how each of your equipment functions and how to use them properly. Always have a clear route as to which you’d follow all throughout your climb, and identify any […]